Welcome to the wonderful world of crochet! If you’ve ever been captivated by the idea of creating soft, handmade items but felt intimidated by complex patterns, you’re in the right place. This guide will walk you through two of the most fundamental building blocks in crochet: the art of increasing stitches and the technique of working on a foundation chain. These skills are the gateway to shaping everything from simple coasters to adorable amigurumi creatures, like a cute crochet hedgehog plush toy. Let’s pick up our hooks and transform a simple strand of yarn into the beginning of something beautiful.
![A pair of hands with blue and white nail polish holds a red crochet hook and yellow yarn, with a clear instructional text box showing "Rnd 2: 6 inc. [12]" on a light wooden background.](https://pub-7b36e40ed3ac4618af4948520c4833c5.r2.dev/2026/04/frame_01_00m05s.jpg "Mastering the Magic Ring and Beyond: A Beginner's Guide to Crochet Increases and Foundation Chains 2")
Understanding the Basics: Your First Increases
Before we dive into shaping, it’s crucial to understand what an increase is. In crochet terminology, an increase (inc) simply means working two single crochet stitches into the same stitch from the previous round. This is the primary method for making your work wider and for creating flat circles or shaping for projects like plush toys.
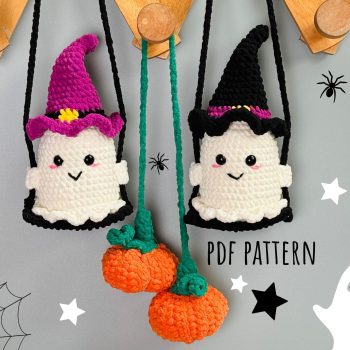
The process typically starts with a magic ring or a small chain. For our tutorial, we begin with a foundation of 6 stitches. The first real shaping happens in Round 2.
Round 2 Instructions: Make one increase in each stitch around.
– This means you will work 2 single crochets into every one of the 6 stitches from the previous round.
– The result? You double your stitch count. From 6 stitches, you will now have 12 stitches.

This consistent doubling is the secret to a perfect, flat circle. If you skip increases or add them inconsistently, your work will begin to curl or ruffle. Mastering this even distribution is key, whether you’re making a simple coaster or the base for a more complex handmade crochet cat loaf plush.
Progressing with Patterned Increases
Once you’ve mastered doubling your stitches, patterns introduce more complex sequences to create gradual, controlled shaping. This prevents your circle from becoming a ruffle and instead forms a smooth, domed shape—perfect for heads, bodies, and other rounded elements.
Let’s look at Round 3 from our tutorial.
Round 3 Instructions: (1 single crochet, 1 increase) repeated 6 times.
– This is written in pattern shorthand as: (1 sc, inc) * 6.
– You will work this sequence six times total: First, make one single crochet in the next stitch. Then, in the following stitch, work an increase (2 single crochets).
– Continue this “sc, inc” pattern all the way around the circle.
– Your stitch count grows from 12 to 18 stitches.
 6 times. [18]” providing clear, step-by-step guidance.*
This pattern of alternating increases with regular stitches creates a gentle expansion. As you advance, patterns might call for sequences like (2 sc, inc) or (3 sc, inc), each one expanding the circle at a slower rate. This foundational skill is what allows you to build the charming, rounded forms found in amigurumi, such as the delightful handmade Bananasaurus plush set.
Working on a Foundation Chain: Creating Ovals and Tubes
While circles are essential, many projects start with an oval or a flat base that isn’t round. This is where working on a foundation chain comes into play. This technique involves crocheting around the starting chain, which allows you to create an elongated shape right from the beginning—ideal for animal bodies, bag bases, or decorative elements.

The process begins with creating a simple chain. In our example, we start with a chain of 9.
Foundation Setup: Chain 9. Start your first single crochet in the second chain from the hook.
– Why the second chain? The loop on your hook does not count as a chain. Starting in the second chain ensures your stitch count remains accurate and creates a neater edge.
– The instruction “working in both sides of a chain” is crucial. You will first work stitches along the top side of the chain, then turn your work and continue stitching along the bottom side of the same initial chains, effectively surrounding the chain with stitches.

Shaping Your First Oval: Round by Round
Creating an oval requires increases at both ends of the foundation chain to form the rounded caps. The first round establishes this shape.
Round 1 Instructions:
1. Start at one end of the chain: Make 1 increase (inc) in the first stitch.
2. Work 7 single crochets (sc) along the top of the chain.
3. At the chain’s end, work 3 single crochets into the last stitch. This cluster of 3 stitches forms the first rounded end.
4. Now, rotate to work along the other side of the foundation chain: Work 6 single crochets.
5. Finish the round with 1 increase (inc) in the final stitch to mirror the start and complete the second rounded end.
– Total Stitch Count for Round 1: 18 stitches.
This formula—increases at the start and end, with a 3-stitch cluster at the very tip—is the standard for creating a symmetrical oval. It transforms a straight line into a shape ready for further development.

Building Upon the Oval Base
With the oval base established, subsequent rounds build upon it to widen the shape uniformly. The increases continue to be placed at the ends to maintain the oval form while the sides grow longer.
Round 2 Instructions: inc, 6 sc, 3 inc, 6 sc, 2 inc.
– Let’s break this down:
– inc: Work an increase in the first stitch.
– 6 sc: Work 6 single crochets along the side.
– 3 inc: Work three separate increases in the next three stitches. This expands the rounded end.
– 6 sc: Work 6 single crochets along the other side.
– 2 inc: Work two increases in the final two stitches.
– Total Stitch Count for Round 2: 24 stitches.

This systematic approach to increasing—concentrating them at the poles of the oval—is what allows you to create beautifully shaped bases for a variety of projects. Mastering this technique opens the door to creating everything from the elongated body of a colorful crochet caterpillar plush to the balanced base of a decorative basket.
Conclusion: Your Foundation for Creative Freedom
Learning to increase and work on a foundation chain is like learning the alphabet before you write a story. These are not just isolated techniques; they are the essential grammar of crochet. Increases give you the power to shape and expand your fabric, turning a flat circle into a sphere or a gentle curve. The foundation chain method liberates you from always starting with a circle, allowing you to craft ovals, rectangles, and other forms that serve as the perfect base for countless patterns.
Remember, consistency is key. Count your stitches at the end of each round, use a stitch marker to note the beginning of a round, and don’t be discouraged if your first few attempts aren’t perfect. Every master crocheter started with a single chain. With these foundational skills in your toolkit, you’re now equipped to read and tackle a vast array of patterns, bringing your own handmade visions—from simple shapes to intricate amigurumi friends—to life, one stitch at a time.