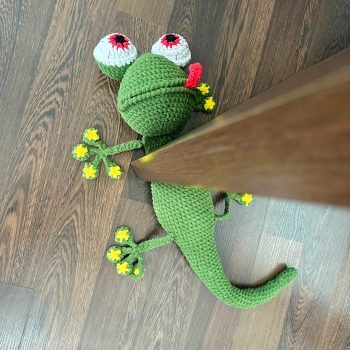
Discover the delightful world of functional crochet art as we walk through the creation of a charming lizard door stop. This project combines the cozy craft of amigurumi with practical home decor, resulting in a unique piece that’s as useful as it is adorable. From the initial shaping of the body to the final, defining details, this guide breaks down the process into manageable steps for crafters of all levels.

The Foundation: Materials and Initial Shaping
Every great crochet project begins with the right materials and a solid foundation. For this lizard door stop, the crafter uses a thick, chunky yarn, which gives the final product both its substantial, textured feel and the necessary weight to function effectively as a door stop. The choice of a vibrant green is perfect for mimicking a lizard’s natural coloration.
The process starts with crocheting the main body, which is essentially a long, stuffed tube that will form the lizard’s torso, head, and tail. Before closing it up, the crafter begins the crucial step of shaping and marking. This is where those colorful pins come into play. They are strategically placed to indicate where increases, decreases, or seams will go, ensuring symmetrical and accurate shaping for features like the legs and the curve of the spine.

Proper stuffing is key at this stage. The crafter is shown inserting a needle, likely to add polyester fiberfill or perhaps weighted pellets to the lower body. This gives the lizard its heft. The stuffing must be firm and even to maintain the shape but not so tight that it distorts the stitches. This foundational work, though less glamorous than adding details, is what transforms a simple crocheted tube into a stable, functional object.
Defining the Form: Assembly and Structural Details
With the body stuffed and pinned, the project moves into the assembly phase, where the lizard truly starts to come to life. This stage involves sewing and manipulating the pinned sections to create definition. The video shows the crafter working meticulously, using the pins as a guide to seam and sculpt the form.

The head and tail become more distinct as the crafter works along the pinned lines. This may involve techniques like invisible seaming or strategic tightening of stitches to create gentle curves and contours. The attention to detail here is critical; a well-shaped head gives the lizard personality, while a properly tapered tail adds to the realistic silhouette. This process is a testament to the fact that crochet is as much about sculpture as it is about stitching.

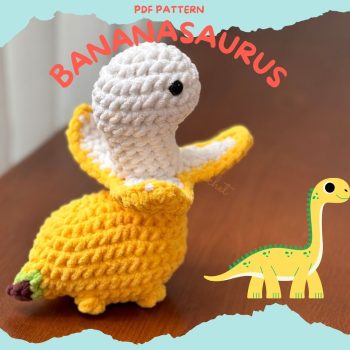
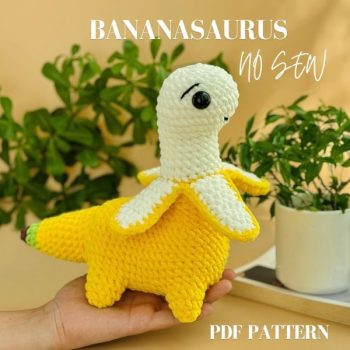
For those who enjoy creating animal-themed amigurumi, the skills honed here—shaping, seaming, and sculpting with yarn—are directly applicable to other projects. You can find similar detailed crafting approaches in patterns for creatures like this Cute Crochet Hedgehog Plush Toy or the whimsical Handmade Bananasaurus Plush Set, where form and function also play key roles.
Adding Personality: The Finishing Touches
The final stage of any amigurumi project is where its character shines through. For this lizard, the defining features are cleverly added with simple yet effective details. A vibrant red crocheted piece is attached to the head, instantly recognizable as the lizard’s flickering tongue. This pop of color adds a playful touch and draws the eye to the face.

Further details likely follow, though not fully shown in the described frames. These could include:
– Safety eyes or embroidered eyes to give the lizard expression.
– Textured stitches or surface crochet along the back to create a spiky ridge, mimicking real reptile skin.
– Felt or crocheted pads for the feet to provide a bit of grip and added detail.
The video also shows a gray object in the corner, which appears to be a tool or a weighted base. This is a crucial component for a door stop. The lizard may be attached to this base, or the base could be inserted inside it, ensuring it has enough weight to hold a door open reliably. This clever integration means the piece is not just a toy but a genuinely useful household item.

Why This Project is a Perfect Crafting Endeavor
This crochet lizard door stop is more than just a craft; it’s a multifaceted project that offers something for every type of crafter. For beginners, it introduces essential techniques like working with chunky yarn, basic shaping, and seaming. For experienced crafters, it presents a fun challenge in creating a functional, weighted object with character.
The project is also incredibly versatile. You can customize it endlessly:
– Yarn Color: Make a blue gecko, a brown anole, or a fantastical rainbow lizard.
– Size: Adjust the pattern and amount of weighting to create a smaller paperweight or a larger, heavier door stop.
– Details: Add stripes, spots, or even a little crochet hat for seasonal decor.

Furthermore, it makes for a thoughtful and unique gift. Unlike a store-bought door stop, a handmade one carries personal significance and artistry. It’s a conversation starter and a cozy addition to any home office, nursery, or living space. The skills you practice here, especially in creating structured amigurumi, are perfect for tackling other advanced patterns, such as the intricate Handmade Crochet Hen & Chicks Gift Set.
Conclusion: From Yarn to Home Decor
Creating a crochet lizard door stop is a rewarding journey that blends craft, creativity, and utility. It demonstrates how the meditative process of crochet can result in an object that is both beautiful and practical. From the initial steps of marking and stuffing the body to the final flourish of adding the tongue and eyes, each phase builds towards a delightful finished product.
The key takeaways from this project are the importance of patient shaping, secure construction for durability, and playful detailing to inject personality. Whether you’re looking to add a handmade touch to your own home or create a special gift, this functional amigurumi project is a wonderful choice. It proves that with a hook, some yarn, and a bit of creativity, you can craft not just an object, but a charming little guardian for your door.