Creating a crocheted animal, or amigurumi, is a labor of love. You’ve painstakingly worked each round, shaped the body, and now you’re left with a charming but faceless creature. This is where the magic truly happens. The process of embroidering the eyes and nose is what transforms a simple yarn shape into a character brimming with personality. Based on a clear tutorial from MINA DIY MADE WITH LOVE, this guide will walk you through the essential finishing touches that give your amigurumi its soul.

The Foundation: Preparing the Face
Before a single stitch of embroidery is made, the canvas must be prepared. The face of your amigurumi is a three-dimensional sculpture, and its final expression depends heavily on this initial shaping. A symmetrical, well-stuffed base is crucial for ensuring features are placed evenly and look balanced from every angle.
The tutorial emphasizes starting with the face fully formed. Your hands should gently mold and adjust the stuffing, ensuring there are no lumps and that the shape is consistent. This step might seem simple, but it’s the difference between a face that looks professionally crafted and one that appears haphazard. Pay close attention to the area where the eyes and nose will go, as this surface needs to be smooth and firm to support the embroidery.

Pro Tip: If you are using safety eyes, they should be inserted before you close the head, securing them firmly with the provided washers. The embroidery we discuss here often refers to creating the whites or highlights around pre-placed eyes or crafting entirely embroidered features for a safer alternative, especially for toys intended for young children. For a completely embroidered eye, you would skip the safety eye and create the entire feature with yarn.
Crafting Expressive Eyes
The eyes are the windows to the soul, even for a yarn creature. This stage involves building depth and life around the central eye element. In the referenced tutorial, the focal point is embroidering the whites or highlights, which instantly adds a spark of realism and charm.
- Secure Your Work: Hold the amigurumi’s head firmly. You may want to use pins to temporarily mark where the white highlights will go to ensure they are even on both sides.
- Choose Your Yarn: A smooth, white yarn is ideal. The tutorial suggests a material like semi-cotton yarn (specifically mentioning Yarnart Jeans), which is durable and provides good stitch definition.
- The Stitching Process: Using a tapestry needle, bring your yarn up from the inside of the head at your starting point. Create small, tight stitches around the black pupil or safety eye. The goal is to form a crescent or circular shape that doesn’t completely encircle the eye but sits to one side, mimicking a light reflection.

The technique is all about tension and placement. Your stitches should be snug enough to lie flat against the crochet fabric but not so tight that they distort the shape of the head. This subtle highlight is what gives the eye dimension, making it look glossy and alive rather than flat and painted on. For different expressions, you can vary the size and position of this white highlight. A larger highlight can make the creature look surprised or cheerful, while a smaller one might give a softer, sleepier appearance.
If you’re looking for inspiration for your next amigurumi project after mastering these techniques, consider creating a menagerie of cute animals. For instance, the adorable expressions on a Handmade Crochet Cat Loaf Plush Set or the sweet face of a Cute Crochet Hedgehog Plush Toy are perfect examples of how embroidered features create undeniable charm.
Embroidering the Perfect Nose
The nose anchors the face and is often the central point of an amigurumi’s expression. Whether it’s a simple triangle for a bear or a tiny inverted ‘Y’ for a cat, precision is key. This section covers both attaching a separate nose piece and embroidering one directly onto the face.
Sewing On a Fabric or Felt Nose
Sometimes, a nose is made as a separate small piece of crochet or felt. The tutorial provides a critical tip for this method:

- Positioning: The nose should be centered between the eyes. The instructions note to place it “between Rnd 11-18,” which is a pattern-specific guideline. Always refer to your pattern, but generally, it sits centrally on the muzzle area.
- The Stuffing Trick: A brilliant professional tip is to sew only about two-thirds of the nose perimeter first. Leave a small section open.
- Final Stuffing: Through this opening, add a tiny bit of extra stuffing directly behind the nose. This plumps it up slightly, giving it a cute, three-dimensional shape that won’t sink into the face. Once satisfied, complete the final stitches to close the opening.
Direct Nose Embroidery
For a fully embroidered nose, the process is similar to the eyes but on a smaller scale.

- Mark the Shape: Lightly mark a small triangle or oval with a water-soluble pen or pin.
- Stitch the Outline: Using black or dark brown yarn (again, a smooth yarn like Yarnart Jeans is recommended for clean lines), use a simple satin stitch or a series of straight stitches to fill in the shape. Start from the center and work outwards to keep it even.
- Mind the Tension: As with the eyes, keep your embroidery tension consistent. Too loose, and the stitches will be loopy; too tight, and it will pucker the fabric.
The choice between a sewn-on or embroidered nose often depends on the desired style and the pattern. An embroidered nose offers a seamless, flat look, while a sewn-on piece adds delightful texture and depth.
Final Assembly and Pro Tips
With the eyes bright and the nose in place, your amigurumi’s face has come to life. The final step is to take a comprehensive look at the entire piece.

- Symmetry Check: Hold the amigurumi at arm’s length and view it from different angles. Do the eyes look even? Is the nose centered? Sometimes, stepping back is the best way to spot minor asymmetries.
- Weaving in Ends: Securely weave all your yarn ends deep into the head using a tapestry needle. This prevents them from working loose over time, especially if the toy will be loved and handled frequently.
- The Right Tools: Using the proper materials makes a significant difference.
- Blunt Tapestry Needles: These are essential. They glide through the crochet stitches without splitting the yarn.
- Good Quality Yarn for Details: As noted, a smooth, semi-cotton or similar yarn for embroidery gives sharper, cleaner details than a fuzzy or single-ply yarn might.
- Sharp Scissors: A small, sharp pair of embroidery scissors is perfect for trimming ends cleanly.
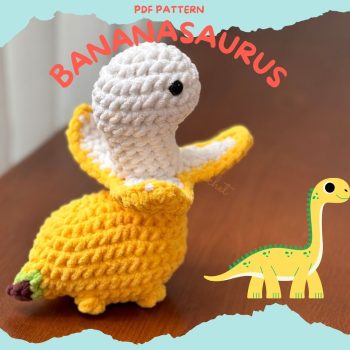
Mastering these facial details opens up a world of creative possibilities. You can apply these same embroidery principles to create a wide variety of characters, from the whimsical Handmade Bananasaurus Plush Set to more complex seasonal projects where expression is key.
Conclusion: The Soul of the Stitch
Embroidering the eyes and nose is not merely a final step in amigurumi creation; it is the act of bestowing character and soul. This process transforms your skilled crochet work into a unique companion with its own expression and personality. By focusing on careful preparation, precise stitching, and attention to symmetry, you elevate your handmade toy from a simple object to a cherished piece of art. Remember the key takeaways: shape the face perfectly first, use the right yarn for clean embroidery, employ the two-thirds stuffing trick for attached noses, and always take a moment to review your work for balance. With these techniques, every amigurumi you create will not just be seen—it will be remembered.