Creating a crochet bunny is a delightful project, but it’s the face that truly gives your amigurumi its personality and soul. A well-embroidered expression can transform a simple stuffed toy into a cherished companion. This guide walks you through the detailed process of adding eyes, a nose, and a mouth to your bunny, turning a crocheted head into a character full of life and charm. We’ll break down each step, from initial shaping to the final, delicate stitches that define its expression.

Preparing Your Bunny and Workspace
Before you thread your first needle, proper preparation is key to a smooth and successful embroidery session. This stage sets the foundation for all the detailed work to come.
Start by ensuring your crocheted bunny head is complete, stuffed firmly, and the yarn end is securely woven in. A firm, even stuffing is crucial; it provides the necessary tension for your embroidery stitches to sit nicely and prevents the fabric from puckering. Place your bunny on a clean, well-lit workspace. Gather all your tools within easy reach. You will need:
- A yarn needle or a sharp tapestry needle with a large eye.
- Embroidery floss or yarn in your chosen colors (typically black for eyes, pink for the nose, and white for eye details).
- A pair of sharp scissors.
- A crochet hook can be useful for adjusting stuffing or manipulating stitches from the inside if needed.

Take a moment to look at your bunny’s face. Gently manipulate the head to find the natural center and visualize where you want the features to sit. This planning phase helps create a symmetrical and pleasing expression. Having a clear vision before you start stitching will make the entire process more intuitive and enjoyable. For more inspiration on creating adorable amigurumi animals, explore our collection of handmade friends like this Cute Crochet Hedgehog Plush Toy.
Attaching the Eyes and Shaping the Face
The eyes are the windows to the soul, even for a crochet bunny. Their placement is the single most important factor in determining your bunny’s expression.
1. Positioning the Eyes
Hold the safety eyes or, if you’re using embroidered eyes, mark the desired spots with removable stitch markers. A good rule of thumb is to place them about an inch apart (depending on the head size) and roughly one-third of the way down from the top of the head. This placement typically gives a sweet, youthful look. For safety eyes, insert the post from the front, add the washer on the inside, and press firmly until it clicks. Ensure they are level.

2. The Art of Shaping
With the eyes in place, it’s time to sculpt the face. This isn’t about adding new material, but about manipulating the existing crochet fabric to create contours. Using your fingers or the blunt end of your crochet hook, gently push and pinch the stuffing inside the head.
- Pinch the fabric between the eyes to create a subtle brow ridge or a more defined muzzle area.
- Gently press above the eyes to create a forehead.
- Shape the cheeks by compressing the stuffing on either side below the eyes.

This step transforms a round ball into a face with dimension. Don’t be afraid to experiment until you achieve a shape you love. The face should now have structure, ready to receive the detailed embroidery that will define its features. This foundational shaping technique is useful for all amigurumi, whether you’re making a bunny, a Handmade Crochet Cat Loaf Plush, or any other creature.
Embroidering the Nose and Eyebrows
Now for the defining details. The nose and eyebrows work together to convey emotion—curiosity, sweetness, or surprise.
1. Embroidering the Nose
Thread your needle with your chosen nose color (pink is classic, but brown or black can work too). A simple triangle or an upside-down “Y” shape are popular and effective choices for a bunny.
- Come up from the back of the head at your chosen nose point, usually centered below the eyes.
- Create the first leg of your shape by going back down a short distance away.
- Come up near your starting point to create the next leg, forming your triangle or “Y”.
- Weave the yarn ends securely inside the head to finish.

2. Adding Expression with Eyebrows
Eyebrows are tiny but mighty. They can be simple straight stitches or gentle curves. Using the same or a coordinating color, plan their placement. They are usually just above the eyes, following the curve of the eye itself or angled slightly to convey an expression.
- Come up at your starting point above one eye.
- Make a small, straight, or slightly curved stitch.
- Go back down and secure the end inside the head.
- Repeat symmetrically for the other brow.

The key here is subtlety. You can always add more stitches to thicken them, but it’s harder to remove them. Step back occasionally to check for symmetry. These features, though small, bring immense character to your bunny’s face.
Creating Lifelike Eyes with White Highlights
If you’ve used safety eyes, this step adds a layer of realism and sparkle. If you’ve embroidered the entire eye, this is where you add depth.
The “whites of the eyes” are not the entire eye, but small reflective highlights. They make the eyes look shiny and alive, as if catching the light.
1. Planning the Highlights
Decide where your light source is coming from (typically the top-left). The highlight should be placed consistently on each eye in the same relative position—often at the 10 o’clock or 2 o’clock position within the black of the eye.
2. Stitching the Highlights
Using white embroidery floss (a single strand is often enough for a delicate look), thread your needle.
- For safety eyes: Come up from the back of the head, bringing the needle out through the center of the safety eye’s pupil or just at its edge.
- Make one or two very small, straight stitches or a tiny “L” shape on the surface of the eye.
- Go back down through the same hole or very close to it, and secure the end inside the head.

- For embroidered eyes: Simply add one or two small white stitches on top of your existing black eye embroidery.

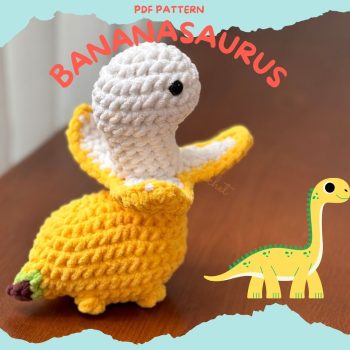
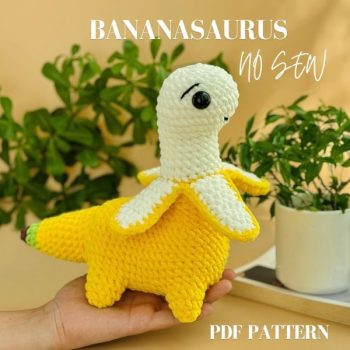
This tiny detail has a monumental impact. It gives your bunny a focused, attentive gaze, elevating it from a toy to a little being with a soul. This attention to detail is what makes handmade amigurumi so special, much like the personality found in our Handmade Bananasaurus Plush Set.
Final Touches and Finishing Your Masterpiece
With the main features complete, take time for a final review and any subtle adjustments.
1. The Mouth: A Simple Smile
A mouth is often the final touch. Using the same thread as the nose or a slightly darker shade, a simple curved line or a tiny “V” beneath the nose can suggest a smile. Keep it small and subtle; often less is more.
2. Symmetry Check and Final Adjustments
Hold your bunny at arm’s length. Look at it from different angles. Are the eyes level? Are the eyebrows even? Does the face look balanced? If something seems off, now is the time to gently adjust. You can sometimes manipulate the stuffing from the inside with your crochet hook to tweak the shape slightly.
3. Securing All Ends
Ensure every single yarn end from your embroidery is woven back into the stuffing of the head securely. Give each thread a gentle tug to make sure it’s locked in place and won’t come loose with play or time.

Conclusion
Embroidering the face of your crochet bunny is where magic happens. It’s a process that blends simple techniques with artistic intuition. By methodically preparing your workspace, shaping the foundation, and carefully adding each feature—from the attached eyes to the delicate white highlights—you transform yarn and stuffing into a beloved character with its own unique expression. Remember, practice makes perfect. Each bunny you make will have its own personality, and that’s the true joy of handmade amigurumi. So gather your tools, take a deep breath, and enjoy the rewarding process of bringing your bunny to life, one stitch at a time.