Looking for a unique, handmade gift that radiates love and holiday spirit? This detailed guide walks you through creating an adorable heart-shaped bear, a perfect Christmas keepsake or cozy winter project. Using simple crochet techniques, we’ll transform soft white yarn into a charming plush friend, complete with step-by-step instructions for every stitch and shape.
Understanding Your Heart Bear Project
Before diving into the stitches, let’s get familiar with what you’ll be creating. This project results in a charming amigurumi—the Japanese art of crocheting small stuffed toys—with a unique twist: its body is a lovingly crafted heart. This design makes it an especially meaningful gift for Christmas, symbolizing love and warmth during the holiday season.
The tutorial is presented through clear, close-up shots of the crafter’s hands, ensuring you can see every loop and pull. The instructions are displayed on-screen in easy-to-follow text boxes, breaking down each round of crochet. You’ll need basic supplies: a gold crochet hook (size will depend on your yarn weight), soft white yarn, fiberfill stuffing, and a yarn needle for sewing.

This bear is part of a wonderful tradition of handmade holiday decor. If you enjoy creating festive items, you might also love our Crochet Christmas Tree Pattern for complementary Scandinavian-style decorations.
Crafting the Heart-Shaped Body
The foundation of your bear is its distinctive heart-shaped body, worked in continuous rounds. This section forms the core of the plushie and requires careful attention to the increasing and decreasing stitches that create the iconic shape.
The process begins with a magic ring, a fundamental technique for starting amigurumi projects seamlessly. The early rounds establish the center of the heart.
- Rounds 1-3: You’ll start with a small number of single crochets (sc) into a magic ring, then follow specific increase patterns. For example, Round 3 instructs: ch1, (1sc, 1inc) * 6 times, slst [18]. This means you chain one, then repeat the sequence of one single crochet followed by an increase (two single crochets in one stitch) six times, finishing with a slip stitch to join the round, resulting in 18 stitches.
- Shaping the Heart: As you progress to rounds like Round 7, the pattern guides you to create the top curves and bottom point of the heart. The instruction “ch1, 12sc, 24sc, 12 sc, slst [48]” is crucial. This sequence of stitches across the round is what forms the two rounded lobes at the top and the tapered point at the bottom of the heart shape.


You will create two identical heart pieces. Once both are complete, it’s time to join them. The tutorial shows a clever technique: using the long yarn tail left from the first heart piece to sew the two halves together around the edges, leaving a small gap for stuffing.

Stuffing and Closing the Form
A well-stuffed amigurumi holds its shape beautifully and is satisfyingly squeezable. This step requires patience to ensure an even, firm fill without lumps.
- Firm Stuffing: Before closing the final gap, you must firmly stuff the heart with fiberfill. Push the stuffing into all the corners, especially the bottom point and the two top curves of the heart, to define the shape. A chopstick or the blunt end of your crochet hook can help position the stuffing.
- Final Closure: After stuffing, use the yarn needle to close the remaining gap with an invisible stitch. Weave in the yarn end securely inside the body so it doesn’t come loose. A well-closed seam ensures your bear will be durable, perfect as a cherished gift or a cute crochet plush toy for a nursery.


Adding the Ears and Final Touches
No bear is complete without its ears! These small, simple additions bring the character to life. The pattern calls for making two identical ears.
The ear construction is straightforward and quick. It begins with a magic ring, just like the body:
– Round 1: 4sc in MR, slst [4]. This means you work 4 single crochets into a magic ring and join with a slip stitch to form a tiny circle.
– Subsequent rounds will likely involve increases to create a small, flat, circular ear. The tutorial shows the hands working this small piece with precision.

Once both ears are crocheted, they need to be attached to the top of the heart body. Position them symmetrically on the two rounded lobes of the heart—this placement makes the heart shape transform into a bear’s head. Use a yarn needle and matching yarn to sew them on securely, weaving ends inside the body.

With the ears attached, your Heart Bear is complete! You can leave it classic and elegant in all-white, or personalize it with a small embroidered nose, eyes using safety eyes (for adult gifts), or a little festive ribbon around its neck for the holidays.
Conclusion: Your Handmade Holiday Treasure
You’ve now mastered the steps to create a delightful Heart Bear, a project that combines the universal symbol of love with the playful charm of an amigurumi. This handmade treasure embodies the personal touch of the holiday season, far more meaningful than a store-bought item. The clear, visual tutorial demystifies the process, from forming the unique heart body to adding the perfect finishing touches with the ears.
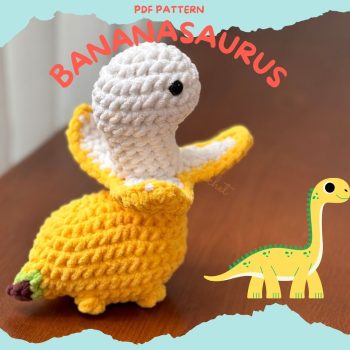
Remember, the key to a beautiful result lies in consistent tension, firm stuffing, and neat sewing. This heart bear makes a wonderful Christmas gift, a charming nursery decoration, or a sweet addition to your own collection. The skills you’ve practiced here, from shaping to assembly, are the building blocks for countless other amigurumi projects. Ready for your next animal adventure? You could try your hand at a whimsical Handmade Bananasaurus Plush for a fun, fruity twist. Happy crocheting, and may your holidays be filled with cozy, handmade joy