The holiday season is a time for warmth, joy, and handmade charm. What better way to add a personal touch to your festive decor than by creating your own miniature Christmas tree? This guide walks you through a simple, beautiful crochet pattern, perfect for crafters with basic skills looking to create a delightful holiday accent. Based on a clear, visual tutorial, we’ll break down each round from the foundation to the distinctive textured rows, ensuring you can follow along stitch by stitch to craft your own little evergreen.

Understanding the Project and Materials
Before diving into the stitches, let’s set the stage. This project creates a small, flat Christmas tree shape with lovely texture, ideal for ornaments, garlands, or tabletop displays. The pattern builds upon itself in rounds, gradually increasing and then decreasing stitches to form the classic triangular silhouette of a tree. The use of front post double crochet (fpdc) stitches introduces a raised, ribbed texture that mimics the branches of a pine tree, adding depth and visual interest to your finished piece.
You won’t need much to get started, which makes this a perfect last-minute or on-the-go holiday project. The essentials are straightforward:
– Yarn: A medium-weight (worsted weight/Aran) green yarn is ideal. The tutorial uses a classic forest green, but feel free to experiment with shades like emerald, pine, or even frosted white for a snowy effect!
– Hook: A size H/8 (5.0 mm) crochet hook pairs well with worsted weight yarn. The tutorial features a bright yellow hook, which provides excellent contrast against the green yarn, making it easier to see your stitches.
– Notions: A yarn needle for weaving in ends and a pair of scissors. You may also want a small amount of brown yarn for a trunk and some miniature beads or sequins for ornaments.
This pattern assumes you are familiar with basic crochet stitches like the chain (ch), single crochet (sc), and double crochet (dc). We will also be using the front post double crochet (fpdc), which we’ll explain in detail. If you’re looking for another festive project after mastering this tree, our detailed Crochet Christmas Tree Pattern offers more sizes and styles to explore.

Round-by-Round Crochet Instructions
Now, let’s get into the heart of the pattern. We will follow the rounds as presented in the tutorial, translating the on-screen text into clear, step-by-step instructions. Remember to maintain a consistent tension for even stitches.
Round 1: Laying the Foundation
This round establishes the base chain from which your tree will grow.
1. Create a foundation chain of 3 stitches.
2. In the second chain from the hook, work 2 single crochet (sc) stitches.
3. You should now have 3 single crochet stitches in total. Do not turn yet; this sets up the starting point for the next round.
Round 2: The First Build
This round begins to shape the very base of the tree.
1. Chain 1 (ch1). This serves as your turning chain.
2. Work 3 single crochet (sc) stitches across the 3 stitches from the previous round.
3. Turn your work. You will have 3 stitches.
Text displayed: “ch1, 3sc, turn [3]”

Round 3: Introducing Texture and Width
Here, we switch to double crochet and introduce the first front post stitch, which starts the textured “branch” effect.
1. Chain 2 (ch2). This counts as your first double crochet.
2. Work 2 double crochet (dc) stitches into the very next stitch from the previous round.
3. Now, work 1 front post double crochet (fpdc) around the post of the next stitch. To make an fpdc: Yarn over, insert your hook from front to back, then from back to front around the post (the vertical part) of the designated stitch below. Yarn over and pull up a loop (you will have three loops on the hook), then complete as a normal double crochet.
4. Work 2 double crochet (dc) stitches into the last stitch of the round.
5. Turn your work. You should have 5 stitches total.
Text displayed: “ch2, 2dc in the same next st, fpdc, 2dc in the last st [5]”

Round 4: Establishing the Pattern
This round continues to expand the tree’s width while solidifying the placement of the textured stitches.
1. Chain 2 (ch2).
2. Work 2 double crochet (dc) into the next stitch.
3. Work 1 double crochet (dc) in the following stitch.
4. Work 1 front post double crochet (fpdc) around the post of the next stitch (this will be the fpdc from the previous round).
5. Work 1 double crochet (dc) in the next stitch.
6. Work 2 double crochet (dc) into the last stitch.
7. Turn. You will have 7 stitches.
Round 5: Continuing the Growth
The tree shape widens further, adding another set of increases.
1. Chain 2 (ch2).
2. Work 2 double crochet (dc) into the next stitch.
3. Work 1 front post double crochet (fpdc) around the next stitch.
4. Work 1 double crochet (dc) in the following stitch.
5. Work 1 front post double crochet (fpdc) around the next stitch.
6. Work 2 double crochet (dc) into the last stitch.
7. Turn. You will have 7 stitches.
Text displayed: “ch2, 2dc in the same next st, fpdc, dc, fpdc, 2dc in the last st, turn [7]”

Shaping the Tree’s Peak and Finishing
After building the tree’s width, the next rounds begin to decrease, forming the pointed top. This creates the classic triangular shape.
Round 6: Beginning the Decrease
We transition from double crochet back to shorter stitches to start tapering the top.
1. Chain 1 (ch1). This is a turning chain for single crochet.
2. Work 2 slip stitches (slst) into the first two stitches. Slip stitches are made by inserting the hook into the stitch, yarning over, and pulling through both loops on the hook in one motion. They create a very short, tight stitch.
3. Work 3 single crochet (sc) stitches across the next three stitches.
4. Turn. You will have 5 stitches.
Text displayed: “ch1, 2slst, 3sc, turn [5]”

Round 7: The Final Round of Increases
This final round adds a last bit of fullness right below the peak before you finish off, giving the tree a gently flared tip.
1. Chain 2 (ch2).
2. Work 4 double crochet (dc) stitches all into the very next stitch. This cluster creates a slight fan or puff effect.
3. Work 1 front post double crochet (fpdc) around the post of the center stitch.
4. Work 4 double crochet (dc) stitches all into the last stitch.
5. Turn. You will have 9 stitches.
Text displayed: “ch2, 4dc in the same next st, fpdc, 4dc in the last st, turn [9]”

Finishing Your Tree
After completing Round 7, you can fasten off. Cut the yarn, leaving a tail of about 6 inches. Yarn over and pull the tail completely through the last loop on your hook to secure it. Use your yarn needle to weave in all loose ends neatly on the back of your tree.
To give your tree a trunk, you can crochet a small rectangle or cylinder with brown yarn and sew it to the base. For a quick trunk, chain 4, single crochet in the second chain from the hook and across (3 sc), work 2-3 rows, then fasten off and attach.
Tips for Customization and Display
Your simple crochet Christmas tree is a blank canvas for holiday creativity. Here are some ideas to make it uniquely yours:
– Embellish: Sew on tiny seed beads, sequins, or metallic thread for ornaments and tinsel. A small crochet star or bead at the very top is the perfect finishing touch.
– Vary Your Yarn: Try a sparkly or variegated green yarn for extra festive flair. A white or silver tree can be a beautiful “frosted” alternative.
– Create a Set: Make several trees in different shades of green and sizes for a charming forest display. They make wonderful gifts, package toppers, or additions to a holiday wreath.
– Incorporate into Other Crafts: Sew a loop of thread to the top to create an ornament, or attach several trees to a ribbon for a festive garland. You could even appliqué it onto a holiday stocking or sweater.
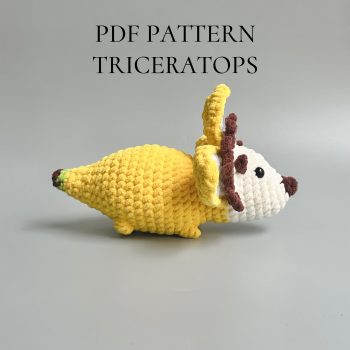
The techniques you’ve practiced here, especially the front post stitch, are building blocks for more complex amigurumi and textured projects. If you enjoyed creating this festive shape, you might love bringing other creatures to life with yarn, like this adorable Cute Crochet Hedgehog Plush Toy or a playful Handmade Bananasaurus Plush Set.

Conclusion
Crocheting this simple Christmas tree is more than just a craft project; it’s a way to infuse your holiday with handmade warmth and personal achievement. By following these clear rounds—from the foundational chain to the textured body and shaped peak—you’ve created a timeless holiday symbol. The beauty of this pattern lies in its simplicity and elegance, proving that you don’t need complex techniques to make something truly special. Whether you adorn your mantel, gift it to a loved one, or add it to your own collection of handmade treasures, this little tree carries the spirit of the season in every stitch. So gather your green yarn and hook, and enjoy the peaceful, rewarding process of creating holiday magic, one loop at a time.